No products in the cart.
WordPress Support
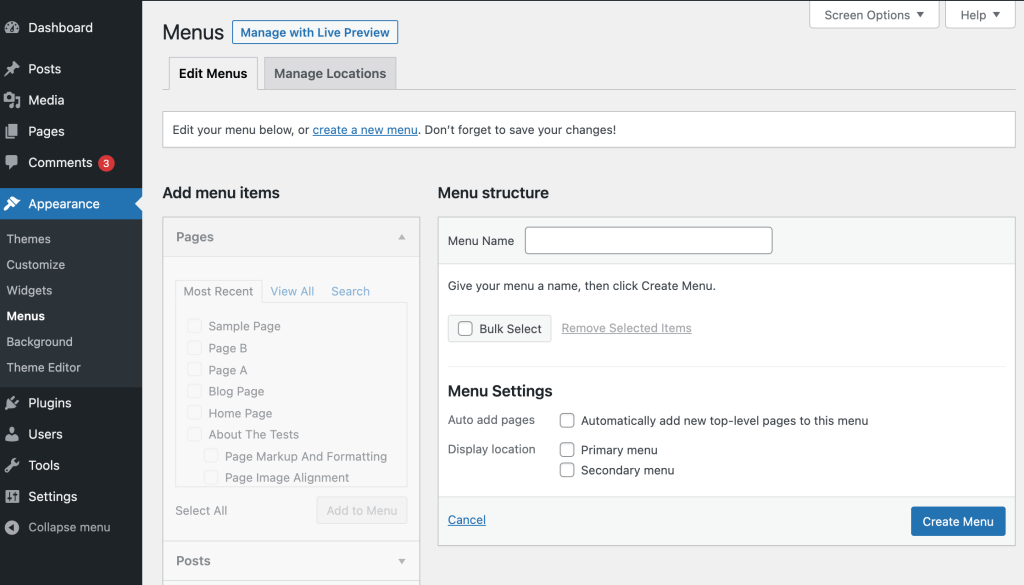
Appearance Menus Screen
The Menu Screen enables user to create a custom menu (also known as navigation bar, navigation menu, or main menu). It is a section of the site which helps visitors to navigate in the site. Depending on the theme used, typically a site will have one navigation menu, while some themes may enable secondary or footer menus. It is essential to have a neat and simplified navigation menu, so as not to confuse your visitors.
By default, WordPress adds all the published pages to the menu automatically. However, customization of menu is possible, such as adding a link to a category or to external site, changing the order of the menu link, or creating a sub-menu.
The Appearance Menu Screen is accessible via Dashboard > Appearance > Menus.
Screen Options
The Screen Options allow you to choose which modules are displayed, or not displayed, in the underlying Screen. Clicking on the Screen Options tab shows a list of the possible modules and options with a check-box next to each. Check the box for each module or option you want displayed, or uncheck the box to not display that module. Click the Screen Options tab again to close the Screen Options.
Certain modules, like Posts are hidden by default.
Creating Menu
- Go to the WordPress Dashboard.
- From the ‘Appearance’ menu on the left-hand side of the Dashboard, select the ‘Menus’ option to bring up the Menu Editor.
- Select Create a new menu at the top of the page
- Enter a name for your new menu in the Menu Name box
- Click the Create Menu button.
Adding Items to a Menu
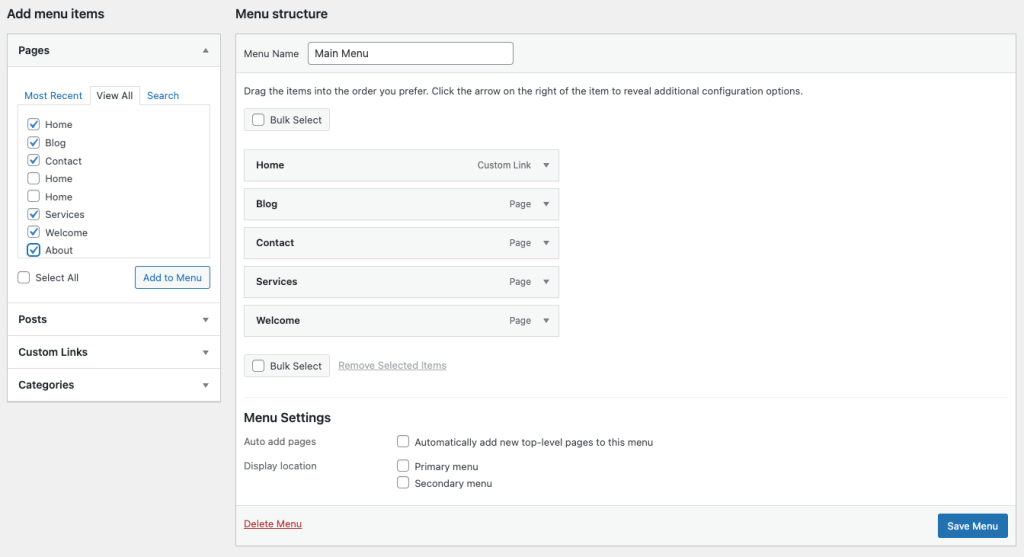
You can add different item types into your menu, such as Pages, Categories, or even Custom Links. These are split between panes left of the menu you’re currently editing. An example on how to add link to a page:
- Locate the pane entitled Pages.
- Within this pane, select the View All link to bring up a list of all the currently published Pages on your site.
- Select the Pages that you want to add by clicking the checkbox next to each Page’s title.
- Click the Add to Menu button located at the bottom of this pane to add your selection(s) to the menu that you created in the previous step.
- Click the Save Menu button once you’ve added all the menu items you want.
Your custom menu has now been saved.
Note: The Screen Options allow you to choose which items you can use to add to a menu. Certain items, like Tags are hidden by default.
Deleting a Menu Item
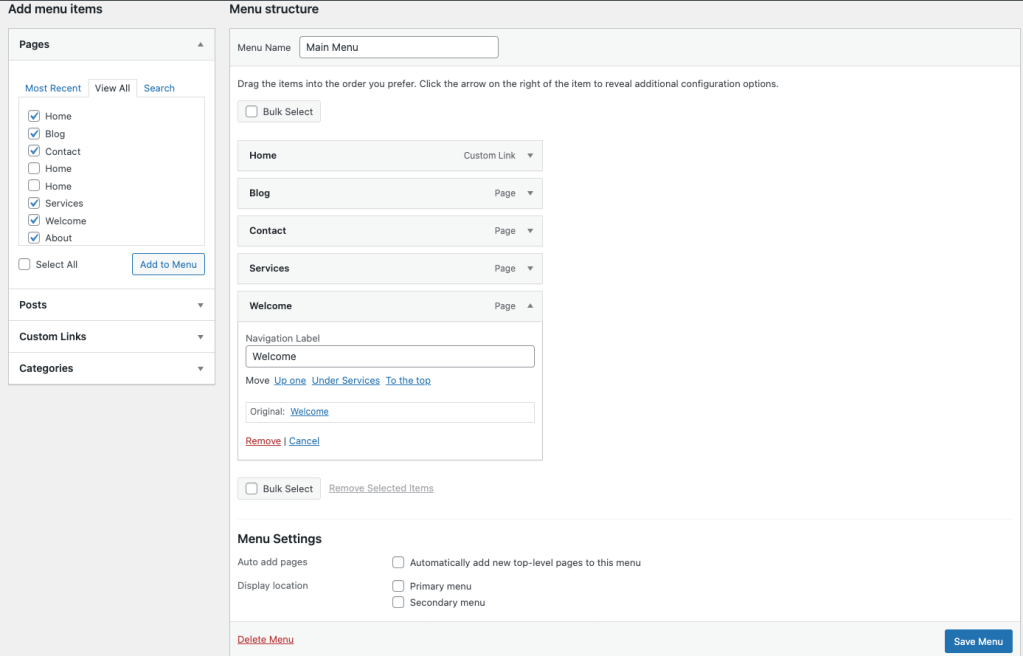
- Locate the menu item that you want to remove in the menu editor window
- Click on the arrow icon in the top right-hand corner of the menu item to expand it.
- Click on the Remove item. The menu item will be immediately removed.
- Click the Save Menu button to save your changes.
Creating Multi-level Menus
When planning the structure of your menu, it helps to think of each menu item as a heading in a formal report document. In a formal report, main section headings (Level 1 headings) are the nearest to the left of the page; sub-section headings (Level 2 headings) are indented slightly further to the right; any other subordinate headings (Level 3, 4, etc) within the same section are indented even further to the right.
The WordPress menu editor allows you to create multi-level menus using a simple ‘drag and drop’ interface. Drag menu items up or down to change their order of appearance in the menu. Drag menu items left or right in order to create sub-levels within your menu.
To make one menu item a subordinate of another, you need to position the ‘child’ underneath its ‘parent’ and then drag it slightly to the right.
- Position the mouse over the ‘child’ menu item.
- Whilst holding the left mouse button, drag it to the right.
- Release the mouse button.
- Repeat these steps for each sub-menu item.
- Click the Save Menu button in the Menu Editor to save your changes.
Adding Your Menu to Your Site
If your current theme supports custom menus, you will be able to add your new menu to one of the Theme Locations.
- Scroll to the bottom of the menu editor window.
- In the section titled Theme locations, click the check box for the location where you want your menu to appear.
- Click Save menu once you’ve made your selection.